Sunday, March 11, 2018

Bringing New Life To Old Crayons

I've been saving an entire plastic storage container of broken crayons since my classroom days. I really wanted to melt them down and make new crayons with them, but was a bit worried they would be harder than I thought. I pictured melted wax all over my kitchen resembling the random crayons left in my car during the hot Texas summers. Like little puddles of miniature colored snowmen that got too much sun.


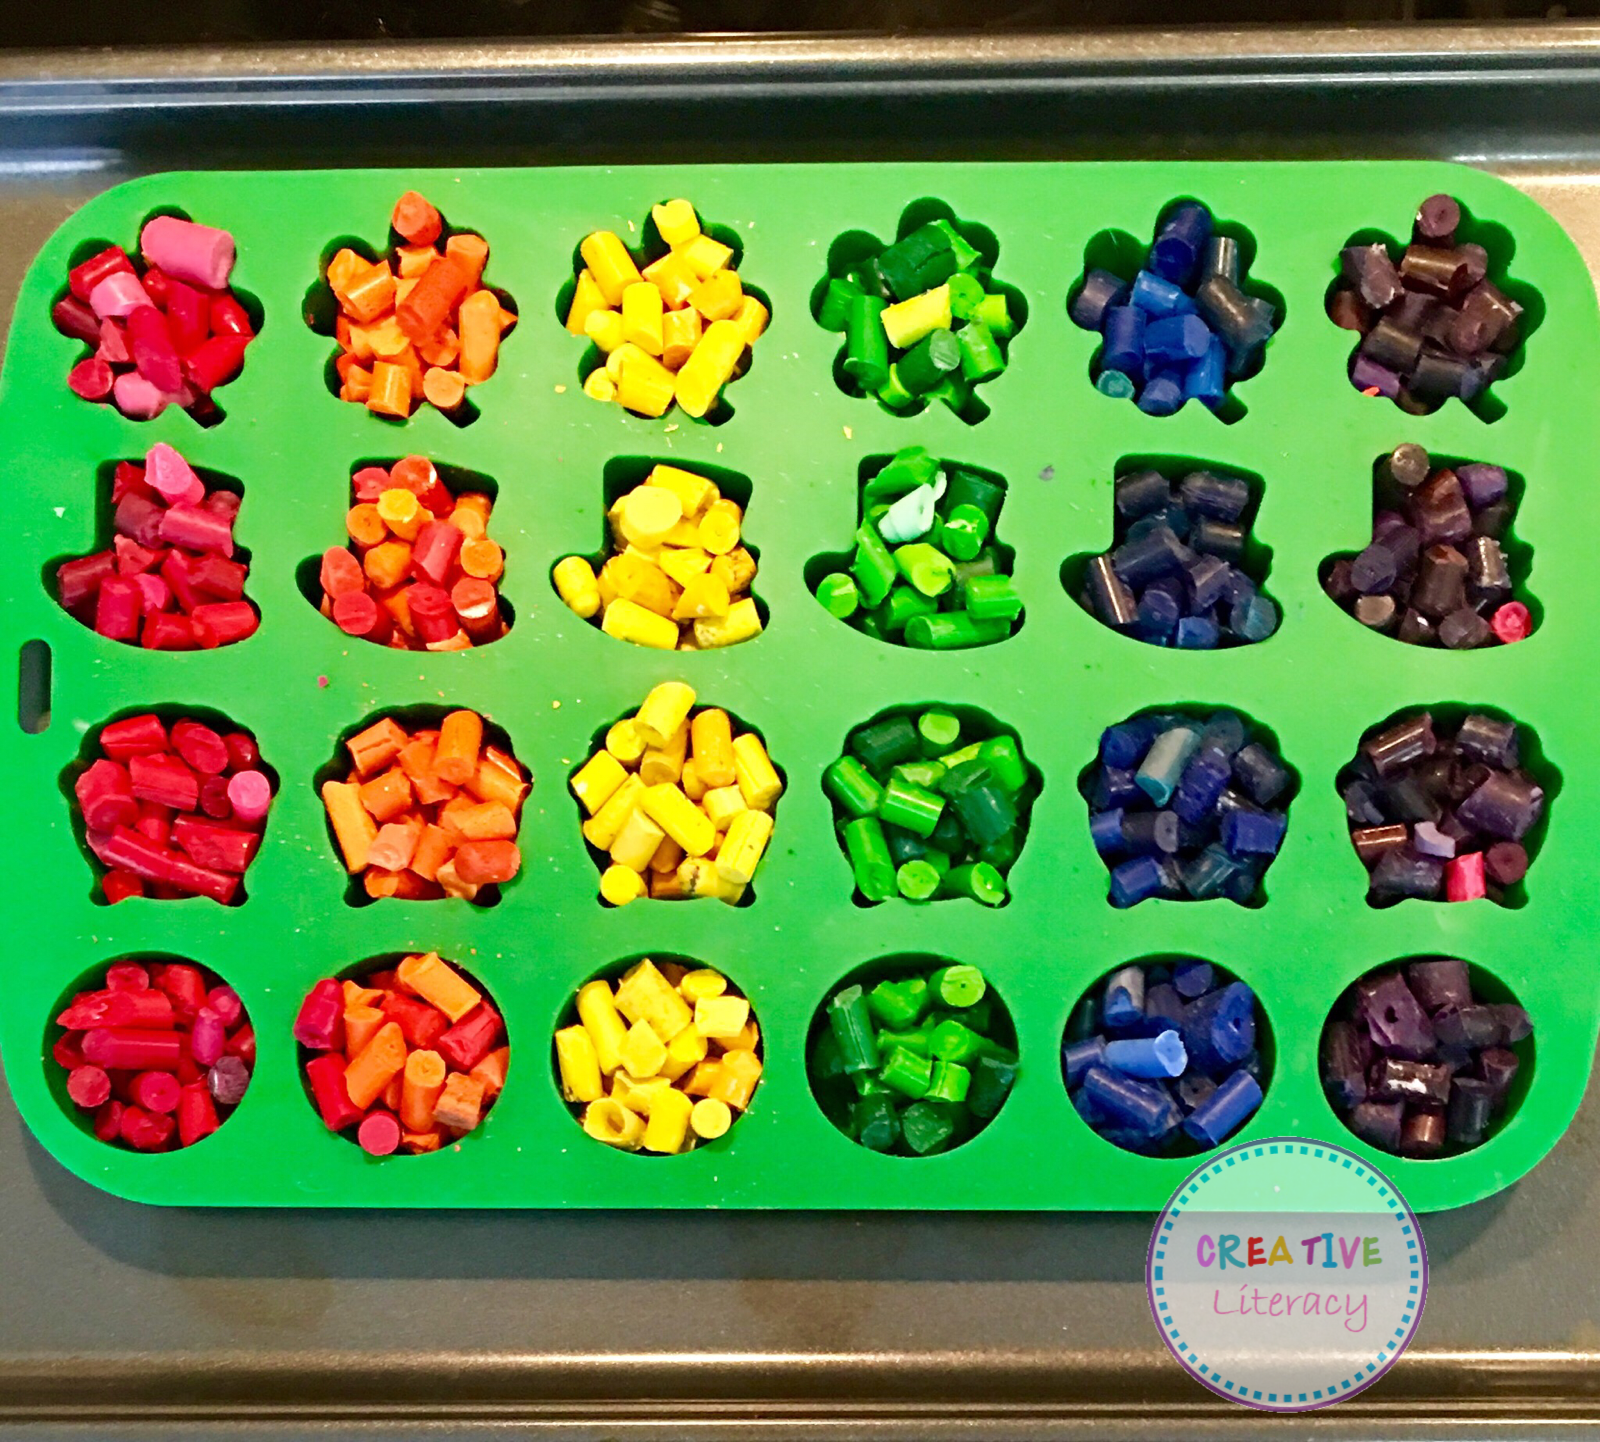
We started by sorting our crayons. We have been talking a lot about rainbows and my youngest is still learning the colors, so this was a great way to incorporate those skills. He wasn't the best sorter, but my daughter was a huge help! We put each color into a clear plastic cup, and they played while I peeled and chopped the crayons. This was by far the longest part, but slicing the label with a box cutter (since I couldn't find my craft knife) made the process much faster.


Once we had all the crayons chopped the kids helped fill the silicone mold. There were six spaces for each of the four shapes, so this mold was perfect for making all of our colors!


Once all of our crayons were in, we (carefully!) moved the mold to a cookie sheet. It definitely would have been smarter to do this first.


We set the oven on 200 degrees and baked them maybe 20 minutes. We checked them often and ended up adding a few more pieces to each section as they melted. It went so much faster than I thought it would!


We pulled them out as soon as they looked fairly melted. I wanted the "chunky" look with different shades of each color. We took them out and let them cool for about an hour and a half. I definitely should have let them cool a little longer, since they still felt warm and a few of them came out less than perfect, but I was really impatient to see the results!


They still came out so much easier than I thought they would! The kids loved seeing the results. and couldn't wait to use them! We put them in this fun box we found and plan on taking them camping with us over St. Patrick's Day!


Have you ever made recycled crayons? What is your favorite tip for making them fun and easy?

Friday, March 2, 2018

Year Round Centers With Seasonal Cards

I love being able to use the same activities more than once. Not only does it make my life easier, but the Littles are able to work on them whenever they want since they are already familiar with them. But we also like to change things up and match our activities to the seasons.


 I began making themed alphabet and letter shapes for each season and holiday and found so many uses for them. I even wrote a post about my Valentine's themed heart letters and numbers and all the ways we learned with them. 


While they are super easy to use all on their own, I wanted some activities the kids could use a bit more on independently as they grow. I came up with some more "structured" centers that guide them and build on what they already know. There are also ideas for using the number and letter cards for activities like the alphabet display above and the letter and number forming practice shown here.


One of the easiest activities is the counting mat. We use the large sized number cards and count out matching seasonal objects onto it. You could also use the smaller size and count the object on the page. There are also ten and twenty frame mats to help with learners who are just starting to count and need a bit more help.


My oldest already knows how to count, but this activity teaches multiple representations of each number. She chooses a number card, counts concrete objects, and finds the matching picture, word, tally, ten frame, and number line. This is the perfect activity for the number of the day!


It can also be a differentiated center by mixing the pieces for a few different numbers and letting the kids sort them. They could even work together in groups to do this.


We are starting to explore the ways numbers work together, so I made this number bonds mat to introduce the idea of fact families. We use a large card to represent the larger number, count that many objects onto it, and break that into two different amounts. Then we match those with the smaller number cards.


 I also made some addition and subtraction mats to practice these concepts in a concrete way. She draws two numbers and counts the correct number of objects for each. (In this case holiday m&m's, because who doesn't get a bit more motivated when chocolate is involved?) Then she moves the objects from both boxes to the other side and counts them together to find the total, and picks the matching number card.


We also made a subtraction mat that works in the same way. She picks two cards, putting the largest in the first box and counting the correct number of m&m's. Then she moves the number of objects in the second box according to that number card. The remaining objects from the first box get moved to the last box to find the answer, and the correct number card gets matched with it.


My oldest also knows most of her letters, but we are working on letter sounds right now, so this is one of our favorite activities. It seems simple, but it is so helpful! We pick a letter card for our mat and start with the objects in our letter bin. Then we walk around searching for other objects that start with the same sound. This is perfect for the letter of the day or week!


We used this word families activity to look at all the words we could create by choosing a rime card and switching out just the first letter. It was also a great introduction to rhyming words.


This same activity can be used for older learners to explore making words on their own. It even comes with a recording sheet to turn in or to laminate so kids can practice writing the words they make.


There is also a spelling practice mat to help with spelling sight words, names, vocabulary words, etc. Any word card can be added in the blank square and the kids use their alphabet cards to build it.


These make great hands-on activities or centers to practice the basic concepts that are so important to foundational learning. With the activities being able to be used all year, they are perfect for students who need a little more practice or for review. Keep the same centers and just switch out the cards for your current theme! You can find these centers in my TeacherspayTeachers store. The bundle includes all current letter and number cards as well as any that will be added in the future, or you can get just the centers by themselves. 

What other centers would you like to see for these cards?

Monday, February 5, 2018

Having Fun (And Learning) With Candy Hearts


I love incorporating holidays, themes, and seasons into our learning. It just seems to make it more fun for all of us. One of our favorite learning manipulatives for Valentine's Day is a bag of candy hearts. They can be used in so many ways and are an inexpensive way to bring some fun into your activities. 


We use candy hearts for so many different lessons that we have a little candy heart center set up. This way the lessons as well as the materials are easily accessible, which is helpful since we homeschool. My oldest can work on these activities whenever she feels like it without waiting for me to pull everything out. This would also be a great way to have your centers set up in a classroom, as it will allow several different activities to be switched out quickly and easily based on student needs.


One easy activity we do is building shapes with the candy hearts. I helped my learner out a bit by drawing the shapes on our chalkboard table and she traced them with the hearts. You could also simply draw the shapes, or let them try to create them on their own. This is great for fine motor skills, so Littlest One just practiced making a straight line. (He LOVES to do activities with his sister!)


 We also used these hearts for a great no-prep measuring center. We simply grabbed some materials from around our learning area, and I asked her how many hearts long she thought they would be. Then we measured the items and compared them to her guess, sneaking in a little estimation lesson.


My oldest did a fun science fair project this year on dissolving candy canes in different liquids. We simplified this a bit and used candy hearts instead of candy canes to make a fun Valentine's experiment. We kept it easy and used vinegar, hot water, and cold water.


We have hearts with letters and numbers on them, which I wrote about in this blog post. We use these hearts along with our candy hearts to practice some of our skills. One thing Bug is focusing on now is letter recognition and formation, so she "traces" her letters with the candy hearts.


She has already mastered counting to ten, but we are practicing her teen numbers by using candy hearts with the printable hearts used as counting mats.


The other day she surprised me by modeling addition problems with her princess toys. (Thank you Mickey Mouse Clubhouse!) Because she showed interest in this, we have begun modeling very simple addition problems using the number cards and candy hearts. 


We started by making a number sentence with the hearts and counting the correct number of candy hearts on each addend. Then we moved the hearts to the other side of the number sentence and she counted them together and found the correct sum.


If you're looking for some easy printable candy heart activities, I have this great Candy Heart Activities Pack in my TpT store. It includes 9 different printable activities to do with your kids. They can also easily be used as a center or glued into a manila folder to create folder games. The pack includes both colored and black and white versions of most activities.


This color sort is great for the littlest learners, or even those older ones that need a little review. It makes a basic activity a little more fun and festive.


If your kids are learning to count, these ten frame pages are a great way to add some hands-on practice.


Another way to practice both counting and sorting is to use this graphing mat. It also has an accompanying page of questions that can be answered based on the completed graph.


These pattern cards are a fun way to introduce patterns. There are 20 different cards, as well as some blank cards for students to create their own patterns. This is a fantastic way to assess whether your students have mastered the idea of patterns.


I think this is my favorite activity in the pack. It is a creative writing activity that allows students to imagine what kind of candy heart they would be. It also includes some questions you can ask your kiddos before they begin to design their heart, as well as two different types of versions for them to write on. This would look so cute as a class display!


This is a fun but simple STEM activity. There are ideas included in order to extend the activity and further understanding of using different methods in order to complete the stacking challenge.


These are great ways to incorporate a little sweetness into your learning using just a bag of candy hearts. Do you use candy hearts in any learning activities? Let me know what your favorite lesson is in the comments!

Thursday, February 1, 2018

13 Learning Activities With Valentine's Hearts

I love Valentine's Day. Pink is such a cheerful color, and it seems like people are just nicer around the middle of February. Being surrounded by chocolate doesn't hurt either. Bringing a bit of this "love"ly holiday into our learning always seems to excite the kids. (Sorry, I couldn't help it!)


I love activities that we can use in many ways. Since our space is limited, (and I may not be the most organized person), it makes life so much easier. I also don't have tons of prep time, so having one versatile set that I can use to teach many skills is always amazing. These are some of the ways I use this Valentine's Alphabet & Number Set in my TeacherspayTeacher store. They do take a little time to cut out, but considering how many activities they can be used for it is totally worth it. It includes a colored version with two different pinks, a red, and a purple, as well as a black and white version, which I love because I can print them in any color I want!


I try to always have a themed alphabet hanging in our learning space. It not only makes the room cuter, but also has some use to it. It's great to be able to refer to the letters whenever we need to.


My daughter knows most of her uppercase letters, so we clipped the lowercase letters onto the larger hearts. I love how this contains two sizes, so we can easily have a visual for the idea of "big" letters and "small" letters.


I also like to display a number line in our room. I keep it on our dry-erase easel so she can refer to it while she works.


There are so many math activities you can use with these hearts. The larger size works great as a counting mat for young learners.


This is one of our favorite activities. I lay the large numbered hearts out, and she orders them and count the correct number of hearts. (She can use the number line for reference if she gets stuck!) We did this with snowman cutouts and pompoms this winter, and she still loves it!


If your learners are starting to add (or subtract, multiply, divide, etc.), these hearts are perfect for modeling math problems! We use the large numbers as number mats in our problem, but you could also use the small ones. Because we are just starting out with number sentences, I used the smaller math symbols so she could easily find the numbers and tell them apart from the symbols. 


You can also model a problem and have them find the correct numbers to complete the sentence.


The big hearts also make great phonics mats. You can have your kids go on a scavenger hunt for the beginning sound. We found hearts for our letter H, because we currently have lots of those laying around! But you can find a few and have them try to see how many other objects they can find to add to the mat. You can even leave them as a display in the classroom.


You can also have them match upper and lower case numbers. We like to pick a few letters at a time and make a memory match game. You could make it a bit easier by printing the uppercase letters in one color and the lowercase in another. Great for an easy differentiation!


The small hearts also make a great tool for practicing spelling words. We are starting our sight words, so that's what we have been practicing, along with our names.


You can also use small objects to practice letter formation by tracing the letters or numbers.


There are a few blank hearts included. We took one of the large blank hearts and wrote "pink heart" on it and added it to our sensory bin, since that is the shape and color we are focusing on. 


You can also add letters or numbers to your sensory bin. You can have the kids choose a number card, and count that number of objects from the sensory bin.


 These are just a few of my favorite ways to use these hearts with my littlest learners. Can you think of any other activities these would be good for? Leave your ideas in the comments below!?

How To Create A Pumpkin Stand For Dramatic

 We love dramatic play. It's one of our favorite activities. One of the best things we did this year was create a pumpkin patch. Natural...