Friday, March 6, 2020

Fun St. Patrick's Day Leaning Activities

I'm super into ancestry. I have all of my grandparent's grandparent's pictures and all the family history. It's so fun to see where you come from! One country that pops up over and over is Ireland. I've always wanted to go there, so having that family history makes St. Patrick's Day a really fun holiday to celebrate.

St. Patrick's Day always makes me think of rainbows. One of the neatest things we did was to make rainbow flowers. We added food coloring into several clear cups, and then put white daisies into each cup. I had done this when I was little with carnations but they didn't have any so I wasn't sure this would work as well. But within a few hours some were already starting to turn! That must have been our thirsty flower, because it took a while for the others to show. Next time we will use carnations or roses since people have had good luck with those. This was fun for my preschoolers, but could also be used with older kids for a great plant unit activity.


We definitely get a lot of use out of our food colors! Since my youngest is still learning his colors, we have been focusing on green for the past few days. I sometimes have to make bath time seem super fun. One of their favorite ways to do this is to color the water. We like to experiment, so we mixed yellow and blue this time and added some bubbles. They had so much fun mixing it together to make the green! This could also be done in a sensory bin for non-bathtime play. You can also make it more fun and hands-on by going on a hunt for green things to add. We had more than enough green toys already in our bath bucket though...


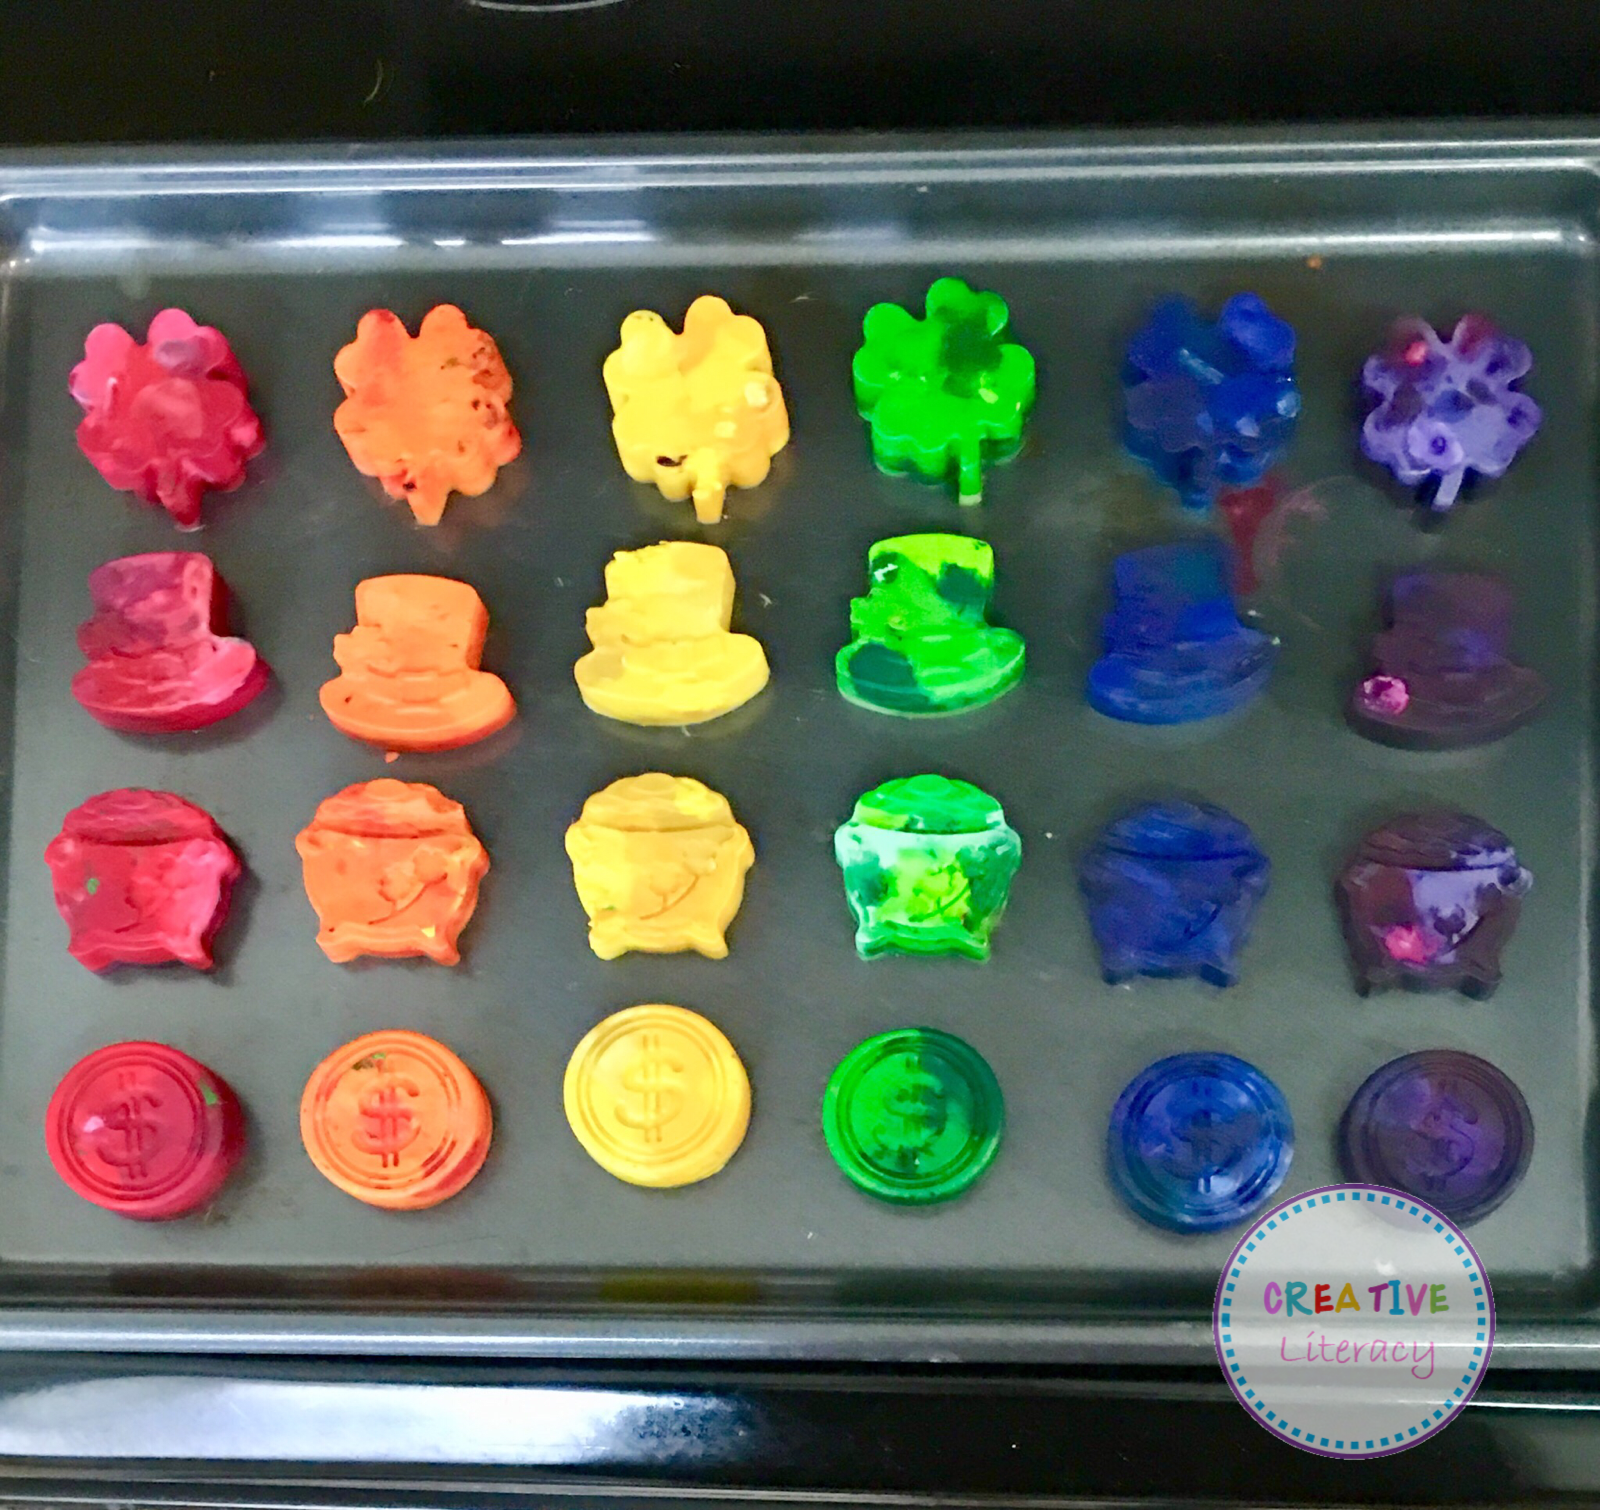
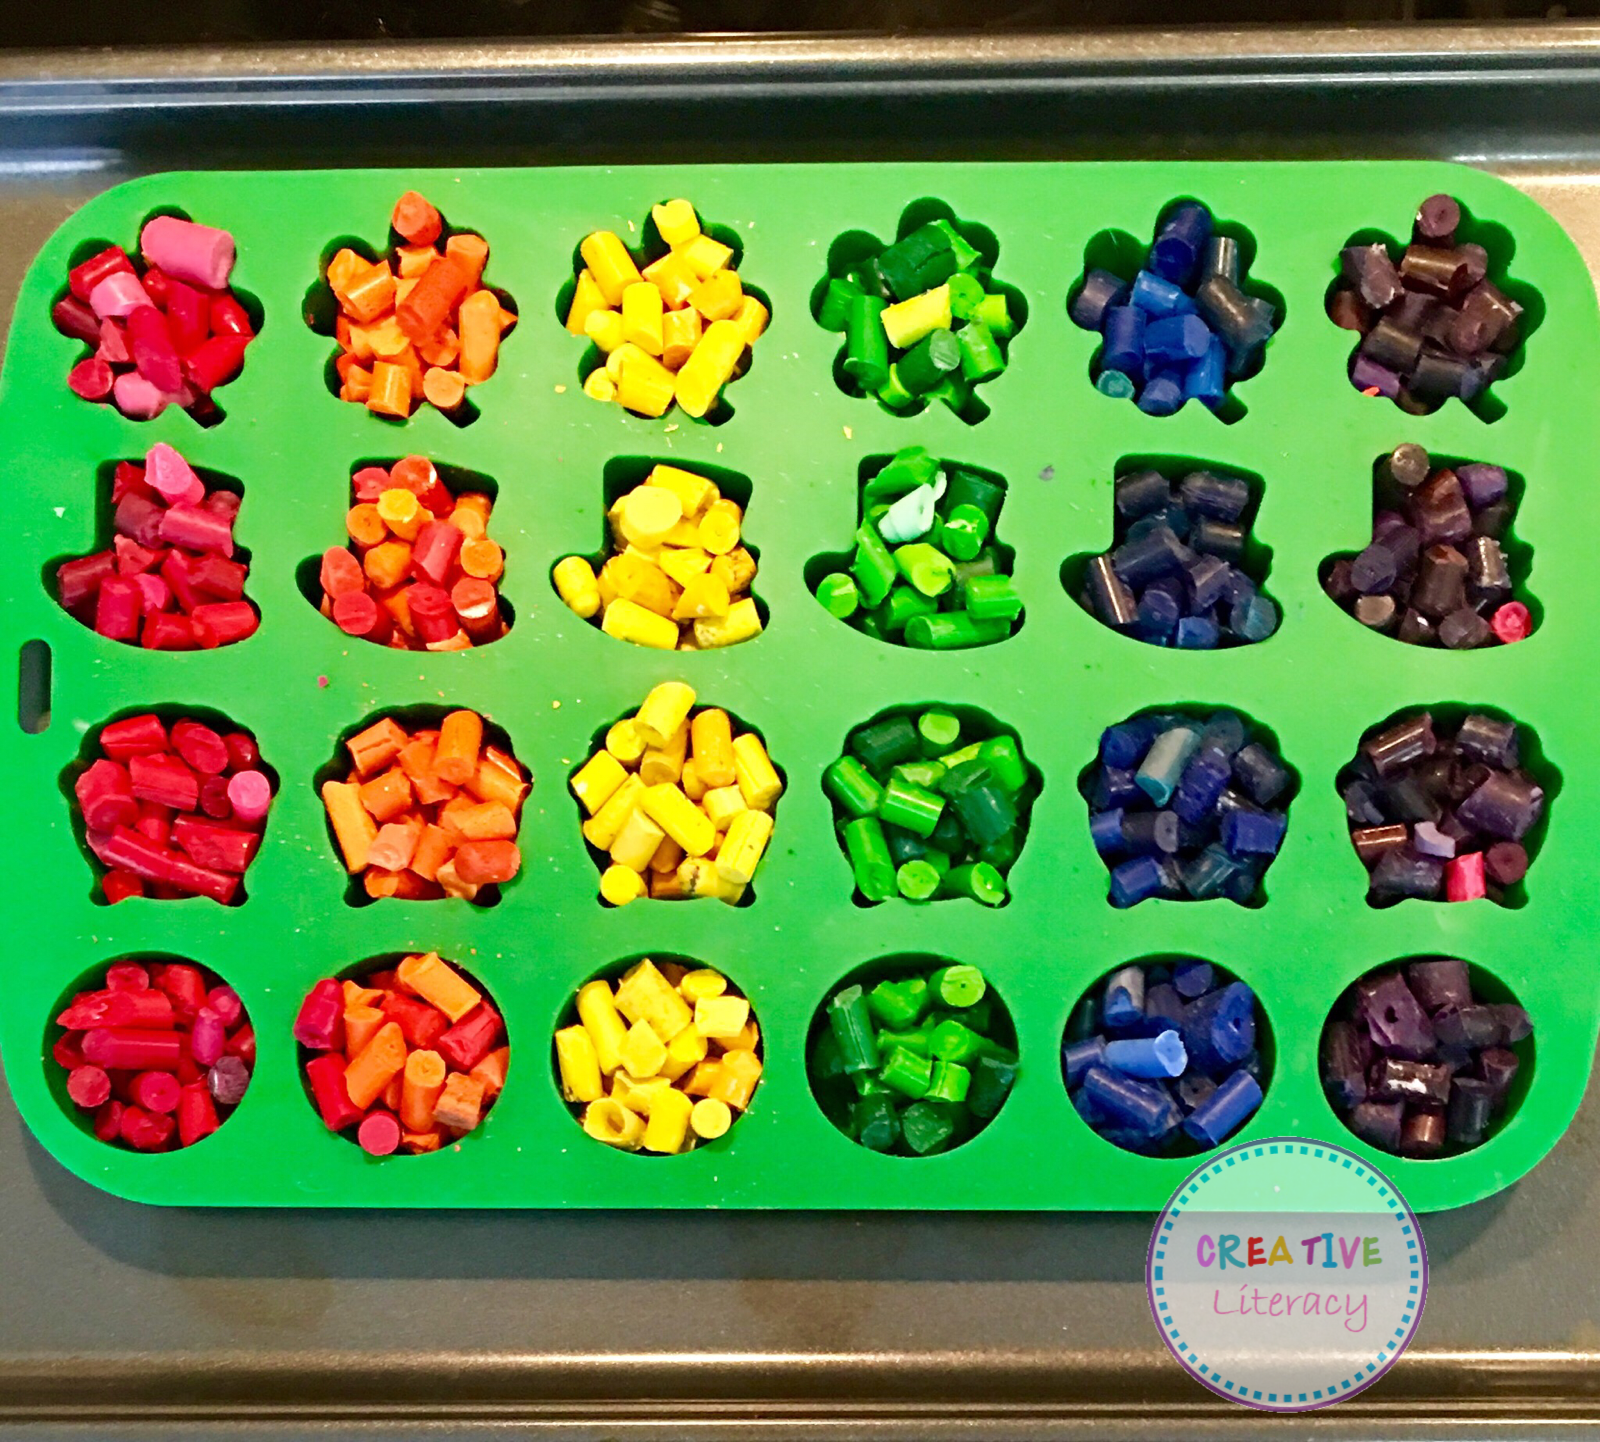
Something I've always wanted to try was to make recycled crayons. We found a really fun St. Patrick's Day silicone mold and used our old broken crayons to make some great new seasonal crayons. It was really easy and the kids loved turning something old into something totally new!


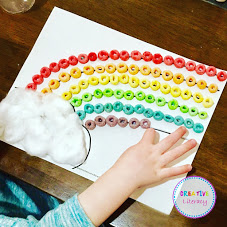
Art is obviously big in our house, so any crafts we can do are always a hit. We made a Froot Loop rainbow activity that the kids colored and glued. It was also great fine motor practice! (And doubled as snack time... Always a plus!)


Our sensory bin was another great activity. We try to create one for each holiday or theme, and incorporate whatever skills we are working on. We used cute glittery shamrocks and plastic coins to practice counting for this one. You can find the shamrock number cards here. (They also include letters!)


Who can make it through St. Patrick's Day without playing with Lucky Charms?
I couldn't find any math manipulatives small enough to use with our ten frames, but these turned out to be perfect! You could also use Lucky Charms to sort into the different marshmallows.


And last but possibly my favorite, we made these fun and colorful rainbow cupcakes to celebrate. We divided up the batter into several bowls, added food coloring to each, then layered them into the liners. After they were cool we added white icing "clouds" and rainbow sprinkles! Cooking with kids is always so much fun and provides so many learning opportunities. We always talk about measurements and fractions (even if they don't fully understand them yet, it never hurts to be exposed!), I let them smell or taste the ingredients, and they love to mix things up - in more ways than one! It also teaches me patience...


What is your favorite activity for St. Patrick's Day? 


Tuesday, October 29, 2019

DIY Yarn Spider Craft

We've spent a lot of time learning about spiders in the weeks leading up to Halloween this year. The kids have loved learning about the life cycle, and I'm pretty sure "spiderling" is my daughter's new favorite word. We are always looking for crafts to incorporate into our lesson, so we decided to put a new spin on the old pipe-cleaner spiders.


I'll be honest. I couldn't remember how I made the little pom pom/pipe cleaner spiders I know I made growing up. I'm sure I could have searched Pinterest for ideas, but I needed some yarn for another project and I came across this fuzzy black yarn in my stash which I thought would be perfect! A few chenille stems, a couple of googly eyes, and a hot glue gun were the only other things we needed to create a cute group of spiders.


We started by taking two stems and cutting them in half to create the legs for our spider. (To make the spiderlings, we cut one stem into fourths.) We took the four pieces of chenille stem and tied the end of the string around them.


Then we wrapped the yarn around the middle of the stems until we had a "body" the size we wanted. (Wrapping the yarn tightly around each side of the body at the end helped it keep it's shape.) We used our hot glue to secure the end of the string to the bottom of the body, and also to glue on our eyes.


Finally, we bent the ends of our legs down so our spider could stand up. They came out really cute and the kids love playing with them! They would also make a cute diy decoration for Halloween.


We added a cotton ball egg sac to our spider and spiderling to make a life cycle. Add a spider web used for decorating and you have a quick, fun, diy playset!


 You could use different colored stems and yarn to create a whole collection of fuzzy spiders. How will you use the spiders you make? Let me know in the comments!


Saturday, April 6, 2019

Letter Crafts to Encourage Learning Basic Phonics

When I was in school anything that included scissors and glue was the most awesome lesson. Add some crayons and googly eyes and you had me. These days I don't see a lot of that, and being an overly crafty person it makes me really sad that we don't always get to encourage more creativity in our kids. (Yes, I was that 6th grade math teacher making foldables and my classroom had almost as many craft supplies as a pre-k class...)


One of the perks of homeschooling my smallest kids is that I get to experiment and find what works best for them, usually adding crayons and glue to nearly everything we do. One of the things I tried was using letter crafts to emphasize letter sounds, hoping the activities would be fun for them but also helping them recognize the letter forms and sounds. 

And it worked. 

We started with a turkey craft around Thanksgiving, right after my daughter had turned 3. She already knew most of her letters, so we mostly did it just as a review. I made a point to emphasize the "t" sound throughout the craft, and I was surprised at how well it stuck. For the next six months (at least) whenever I asked her what sound the letter T made she responded with "t,t,t, like turkey!"


After we made our lowercase t I found some fall colored feathers at the craft store. Of course we had to use them for something, so since little brother is still working on his uppercase letters we reviewed the capital T and made turkeys using the feathers. Using turkeys for both was a great way to reinforce the idea that even though they look a little different, they are also the same and make the same sound.


I'm definitely not saying this is a miracle method, but the first letter my youngest recognized was also his first letter craft. I know not all kids will be learn through this activity, but any time I can enforce concepts and relate to real life in a fun way, I'm all about it.

We create our letter crafts in a few different ways. To make a quick and easy activity we cover a blank letter with objects beginning with that letter. They can all be the same object (covering an h with hearts), or different objects beginning with that sound (covering the letter m with pictures of moons, mice, milk - this makes a great scavenger hunt!) We covered this S with plastic spiders for Halloween.


They can also be turned into objects or animals. This apple was a great way to incorporate the letter a, and it works for upper and lower case!


You can even use the five senses - we love creating letters with dimension, like this "O for oatmeal" activity we did during our farm unit. It would also be great for an apple unit alongside an apple pie sensory bin!


We hang our letter crafts on our display wall while we work on that unit, then they go into a notebook like this for reference. I know this will also make a super cute keepsake one day!

Here are a few of our other favorite letter crafts!

This super-fun rainbow:


Our handprint reindeer:


This lowercase bee:


A handprint Jack-o-lantern:


This Cheerio octopus:


As you can see, we like to have fun with our letters. Not only do these crafts make learning the alphabet exciting, but they also reinforce letter sounds and help get my kids ready to begin reading! So grab some crayons and glue and go teach those letters!

(If you don't want to spend time creating your own letters, you can find them in my Teachers Pay Teachers store here.)

Friday, October 19, 2018

Why You Should Add A Sensory Bin To Your Learning Centers


It's no secret that kids learn better when they can experience whatever it is they are studying. Books and crafts are great. We absolutely love both of those things and use them All. The. Time.

But we also use a simple but powerful box of learning magic to reinforce every unit we learn about. It's full of wonderful goodness that contains amazing objects that enhance understanding and hold the attention of my tiny learners. 

It's called a sensory bin.


They can be as simple as white rice and cups or as detailed as a scene with miniature animals. They can help kids better understand concepts like shapes, colors, science, habitats, life cycles... The possibilities are truly endless. 

We started out using mostly edible ingredients when my kids were really young because I knew they would probably end up tasting it all anyway. Since then we have progressed into more detailed, play centered bins. Even at 4 and 2 years, sensory bins can really hold their attention and are the perfect activity to teach them numerous skills. 

We started out with bins concentrating on colors or shapes. Or even combining the two. This was when we were focusing on the simplest concepts
and our play was based on discovery and observations. This was our blue bin. The base was dyed rice and we added anything blue we could find. Paper circles, crayons, Legos, pom poms, etc. Going on a "color hunt" also made a great activity! We used this during winter, so we added some snowflakes to tie in the weather.


We also use sensory bins to explore themes within seasons. This fall bin was one of my favorites, because we added things that smell fallish, like cinnamon sticks, cloves, and nutmegs. Then we finished it off with fake leaves and pumpkins, pumpkin seeds, pinecones, dried corn, and even a pumpkin cookie cutter!


This was a really easy bin for St. Patrick's Day. We used some leftover Easter grass, plastic golden coins, and glittery plastic shamrocks to create the main bin. Then we used these cards to add some numbers that we used as counting mats.


This was one of the other bins we used the grass for. It was our main Easter bin. We added little chicks, foam and plastic eggs, and cups of stamps, cookie cutters, and little bunny erasers. The eggs on the sticks were great for sticking in an upside down colander for fine motor practice!


This was our other Easter bin. We used different colored dyed rice, plastic eggs, feathers, and these eggs to match upper and lowercase letters.


This Valentine's bin was one of my favorites. We used pink and red as the theme, with silk rose petals as the filler. Then we added plastic hearts, crayons, chenille stems, and glittery hearts on sticks that I numbered. (We also used these with our colander.) 


It was easy to change this out and create another counting bin by putting the plastic hearts in a pink paper cup and adding more number cards


Can you tell I love these cards? You can see some of the ways we use them in this blog post.

Sensory bins are definitely not just for Littles though! We also use them to explore so many more complex topics.

We used this simple bin when we started talking about zoo animals. It started with some dried beans, a few animals, a couple of plastic rocks and trees, and some glass marbles for water.


As we learned about more animals, we added another set of them, as well as some wooden blocks to build enclosures. We also sorted the animals into their separate enclosures and later made a cave from the blocks. This was great for imaginative play, learning about the animals, and even sharing...

We had to discuss that taking all the blocks and letting someone "borrow" a few was not, in fact, the correct way to share. Preschool logic!


This was another fun habitat bin. We used blue water beads, sea shells, and some plastic ocean animals. We also learned not to add real starfish or cover the bin. (After a couple days of wondering what the small was.)

We also added some shovels and empty 3D shapes for the kids to experiment with.


Our plant unit was a great way to incorporate a sensory bin. The filler was dried peas and we added some small garden tools, seeds, silk flowers, and plastic butterflies. They had so much fun "planting"!


This was another one of my favorite bins, but it was so easy! The kids are constantly asking to help me cook and loving playing in their toy kitchen, so this was the perfect bin for our fall unit! Cinnamon sticks, plastic apples, felt "crust", small pie pans, and some measuring scoops were added to a bin of oatmeal and the kids played with this for hours during the time we had it out!

 Sensory bins are definitely a learning staple here. They can be as simple or in depth as you want, but provide hours of learning opportunity! Do you use sensory bins? What is your favorite to create?

Sunday, October 14, 2018

Using Apples To Teach Growth Mindset


Have you ever been in the middle of a lesson and thought “oh my goodness! This would make the best activity for _____!”

I got so excited the other day while I was creating some activies for our upcoming apple unit and this happened to me. These days students are so stressed out from the pressures of tv and social media and the idea that everyone should be perfect. With my son beginning junior high this week, it is something I remember from my time at that age and something I am not looking forward to him experiencing.


This is a simple activity to remind students that even though they may not all be just alike, they all have something that makes them special.


Do you remember the first time someone showed you that if you cut an apple in half horizontally it creates a star? I have no idea how old I was when I learned this, but I know it was forever ago and I still think it's so cool!

I used different colored apples to emphasize this lesson. The apples were different sizes, shapes, and colors, which was a great introduction to how people are all different. I also pointed out how pretty all the different colored apples looked grouped together. We talked about how boring it would be if everyone looked and acted the same way.


I noticed one of our apples had a brown spot, which made a great improvised lesson. I pointed out that even though the apple had a little part that may not be perfect, the apple was still perfectly fine to eat. It was a great way to point out the fact that we all have imperfections, and they are only a tiny part of who we are as a whole.


We then talked about what we know about apples. My kids are pretty small so we just talked about the basic attributes of apples, but this could definitely be used with any age and answers from older kids are always fun! 

After this discussion I cut one of the apples in half vertically. We discussed what the inside of the apple looked like and anything special about it.


I then asked them if they thought the inside of the apple would look the same if I cut it differently. You may have students who know it will make a star, but also some that don't. I cut the apple in half horizontally and my kids were surprised to see that the seeds inside now made a star pattern.


We took this opportunity to discuss how sometimes we can look at something over and over and not see the thing deep inside that makes us special or surprises us. Something we may not know is there until we look at each other or even ourselves until we take the time to look inside us in another way. 


This was such an easy hands-on lesson with an extremely powerful message! If you want an easy way for students to record their observations (plus some prompts to encourage your students to write about the special qualities inside themselves and others!), you can find my Apple Growth Mindset resource in my Teachers Pay Teachers store.

https://www.teacherspayteachers.com/Product/Apple-Observation-and-Growth-Mindset-Activity-4006202

Sunday, March 11, 2018

Bringing New Life To Old Crayons

I've been saving an entire plastic storage container of broken crayons since my classroom days. I really wanted to melt them down and make new crayons with them, but was a bit worried they would be harder than I thought. I pictured melted wax all over my kitchen resembling the random crayons left in my car during the hot Texas summers. Like little puddles of miniature colored snowmen that got too much sun.


We started by sorting our crayons. We have been talking a lot about rainbows and my youngest is still learning the colors, so this was a great way to incorporate those skills. He wasn't the best sorter, but my daughter was a huge help! We put each color into a clear plastic cup, and they played while I peeled and chopped the crayons. This was by far the longest part, but slicing the label with a box cutter (since I couldn't find my craft knife) made the process much faster.


Once we had all the crayons chopped the kids helped fill the silicone mold. There were six spaces for each of the four shapes, so this mold was perfect for making all of our colors!


Once all of our crayons were in, we (carefully!) moved the mold to a cookie sheet. It definitely would have been smarter to do this first.


We set the oven on 200 degrees and baked them maybe 20 minutes. We checked them often and ended up adding a few more pieces to each section as they melted. It went so much faster than I thought it would!


We pulled them out as soon as they looked fairly melted. I wanted the "chunky" look with different shades of each color. We took them out and let them cool for about an hour and a half. I definitely should have let them cool a little longer, since they still felt warm and a few of them came out less than perfect, but I was really impatient to see the results!


They still came out so much easier than I thought they would! The kids loved seeing the results. and couldn't wait to use them! We put them in this fun box we found and plan on taking them camping with us over St. Patrick's Day!


Have you ever made recycled crayons? What is your favorite tip for making them fun and easy?

How To Create A Pumpkin Stand For Dramatic

 We love dramatic play. It's one of our favorite activities. One of the best things we did this year was create a pumpkin patch. Natural...